Brewing Guides
How to Brew Pour-Over Coffee at Home
Daniel McNair, Head Roaster & Co-Founder · June 29, 2026
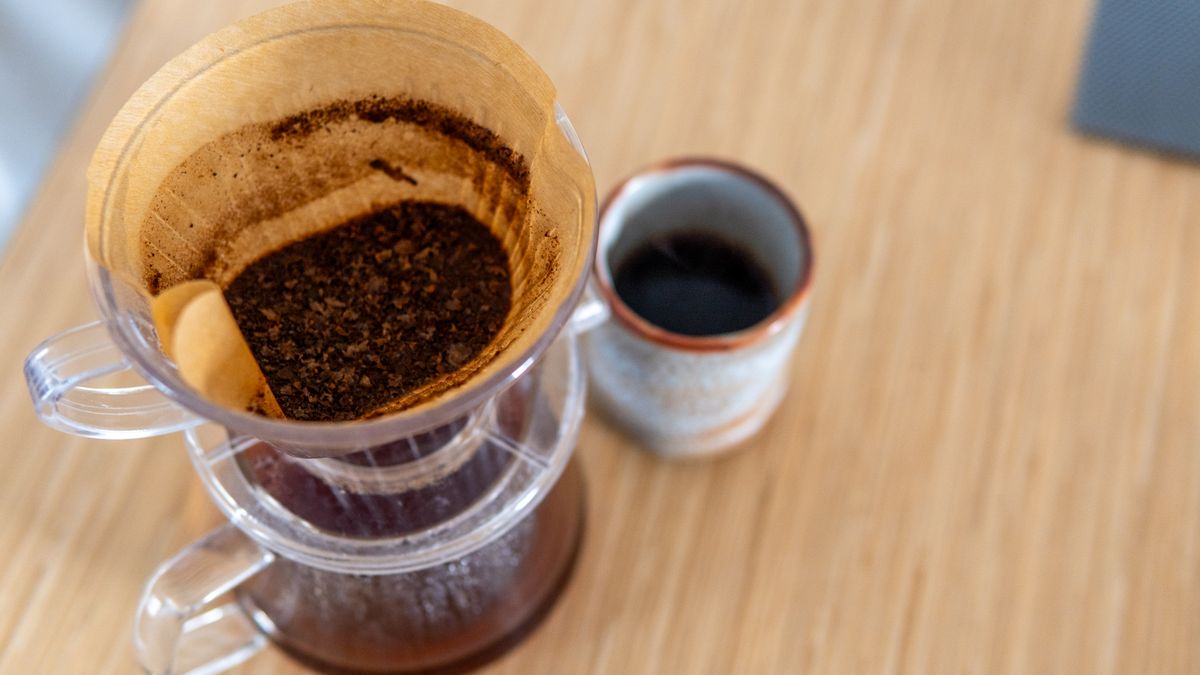
There is a reason pour-over has become the go-to method for people who care about their coffee. It is cheap to start, and it gives you a clean, sweet cup that shows off everything good about fresh beans. If you have ever wondered how to brew pour-over coffee at home and actually get it right, this is the guide. We will cover the gear, the numbers, and the pour itself, step by step.
Pour-over is just hot water passing through a bed of ground coffee in a filter. That is the whole idea. But a few small details, the grind, the ratio, the water temperature, and how you pour, are the difference between a flat cup and one that makes you stop and pay attention.
Why pour-over is worth learning
Pour-over puts you in control. You decide how fast the water moves, how evenly the grounds get wet, and how strong the cup turns out. A paper filter catches most of the oils and fine particles, so the result is bright and clean. That clarity is why pour-over is such a good way to taste what a single-origin coffee really has to offer.
It also forgives a small budget. You do not need an expensive machine. A dripper, filters, and a way to weigh your coffee will get you most of the way there. The beans matter far more than the equipment, which is good news for your wallet and your cup.
The gear you need
You can keep this list short. Here is the honest version of what helps.
- A dripper. A plastic, ceramic, or glass cone like a V60, a Kalita Wave, or a Chemex. Any of them works. Cones with a single large hole reward a careful pour, while flat-bottom drippers like the Kalita are a little more forgiving for beginners.
- Paper filters sized for your dripper.
- A kitchen scale. This is the one upgrade that changes everything. Brewing by weight instead of scoops is the fastest way to make your coffee consistent. A cheap scale that reads to one gram is plenty.
- A burr grinder. Whole beans ground right before you brew taste noticeably better, and a burr grinder gives you the even particle size pour-over needs. Pre-ground works in a pinch, but grinding fresh makes a real difference.
- A kettle. A gooseneck kettle gives you a slow, controlled stream and makes pouring easier. It is not required to start, though. Any kettle and a steady hand will do at first.
A quick word on beans, since they do the heavy lifting. Buy whole bean, keep them whole until you brew, and store them in an airtight container somewhere cool and dark, away from heat, light, and moisture. Do not refrigerate them. For the best flavor, brew within about three days to a month off the roast date, and a bit longer if you have kept them sealed airtight. If you want to go deeper, we wrote a full guide on how to store coffee beans.
The numbers that matter
You only need to remember four things. Get these in the right range and you are already brewing better than most coffee shops down the street.
Ratio: 1:16 to 1:17
This is the weight of coffee to the weight of water. A ratio of 1:16 means 1 gram of coffee for every 16 grams of water. For a large mug, that is roughly 25 grams of coffee to 400 grams of water. Most people land somewhere between 1:15 and 1:17. If your cup tastes weak or sour, use a little more coffee. If it tastes heavy or harsh, use a little less. Start at 1:16 and adjust from there.
Grind: medium
Aim for a medium grind, about the texture of table salt or coarse sand. Grind too fine and the water drains slowly, which over-extracts the coffee and turns it bitter. Grind too coarse and the water rushes through, leaving you a thin, sour cup. Grind size is your main control over brew time, so it is the first thing to adjust when something tastes off. If you want the full breakdown across every brew method, see our coffee grind size guide.
Water temperature: 195 to 205 degrees Fahrenheit
That is 90 to 96 Celsius, the range specialty roasters and the Specialty Coffee Association point to. Water cooler than that under-extracts and tastes flat. Hotter, near a rolling boil, can scorch the grounds. No thermometer? Bring the water to a boil, then let it sit for about 30 seconds before you pour. That drops it right into the window.
Time: about 2.5 to 4 minutes
For a single cup, the whole brew should take roughly two and a half to four minutes from your first pour to the last drip. Bigger batches sit at the longer end. If yours finishes much faster, grind finer. If it drags past four minutes, grind coarser.
Four numbers. Ratio, grind, temperature, time. Dial those in and the rest is just pouring.
How to brew pour-over coffee at home, step by step
Here is the routine, start to finish. Once you do it a few times it takes about five minutes and stops feeling like a science experiment.
- Heat your water. Bring it to a boil while you get everything else ready, then let it rest about 30 seconds so it settles into the 195 to 205 degree range.
- Grind your coffee. Weigh your beans first, then grind to a medium, salt-like texture. For a standard mug, start with 25 grams of coffee.
- Rinse the filter. Set the paper filter in your dripper and pour hot water through it into your cup or carafe. This washes out any papery taste and warms everything up. Dump that rinse water before you brew.
- Add the grounds and zero the scale. Pour your ground coffee into the filter, give it a gentle shake to level the bed, set the dripper on your cup, place it all on the scale, and zero it out.
- Bloom. Start your timer and pour just enough water to wet all the grounds, about twice the weight of your coffee. For 25 grams, that is roughly 50 grams of water. You will see the bed puff up and bubble. That is carbon dioxide escaping fresh coffee, and it means your beans are fresh. Let it sit for 30 seconds. Skipping the bloom leaves you with uneven, hollow extraction, so do not rush it.
- Pour in stages. After the bloom, pour the rest of your water slowly in steady circles, starting near the center and spiraling outward, then back in. Keep the water off the very edge of the filter. Pour in two or three additions, letting the level drop a bit between each one, until you hit your total water weight.
- Let it finish and drain. Wait for the water to draw down through the bed. When the dripper stops dripping, remove it, give the cup a gentle swirl, and drink it while it is hot.
If your first cup is not perfect, that is normal. Change one thing at a time. Bitter and slow? Grind coarser. Sour and fast? Grind finer. Too weak? Add a little more coffee. Small adjustments, one at a time, and you will find your cup quickly.
A few habits that make a real difference
The biggest jump in quality usually comes from the beans, not the technique. Fresh, well-roasted, whole-bean coffee tastes better than a perfectly executed brew of stale beans every time. If you have only ever brewed grocery-store coffee, freshly roasted beans will surprise you. We made that case in fresh-roasted vs. grocery-store coffee, and we go further into what sets good beans apart in why specialty-grade coffee matters.
Pour-over also shines a light on what is in the bag, which is why it pairs so well with single-origin coffee. A washed Ethiopian tastes nothing like a Colombian, and pour-over lets you taste exactly why. Our Ethiopian Yirgacheffe, with its honey, blueberry, and floral notes, is a favorite for this method. If you prefer something rounder and sweeter, the Costa Rica Las Trojas brings milk chocolate, toffee, and red apple. Curious about why origin matters this much? Start with single-origin vs. blends.
And keep weighing your coffee. A scale is the cheapest, most reliable upgrade you can make. Scoops vary wildly, weight does not.
Brew something worth pouring
You now know how to brew pour-over coffee at home: the right ratio, a medium grind, water in the right range, a proper bloom, and a slow, steady pour. The method is simple. What it asks for is fresh, honest coffee to work with.
That is what we roast. Kingdom Coffee Roasters is a small-batch, single-origin roaster in Arkansas, and we ship our coffee the same week we roast it, with free shipping over $50. That means it lands on your counter inside the freshness window your pour-over deserves. If you want great beans showing up on a schedule, our monthly subscription saves you 10 percent, ships fresh, and you can pause or cancel anytime. Prefer to pick by the bag? Browse the whole lineup in the shop.
One last thing worth knowing. The profits from your coffee help fund Gospel outreach to people who have never heard the Good News. So a better morning cup ends up doing a little more than waking you up. That is a pour worth making.
Common questions
What is the best ratio for pour-over coffee?
A good starting point is 1:16, meaning 1 gram of coffee for every 16 grams of water. That is about 25 grams of coffee to 400 grams of water for a large mug. If your cup tastes weak, move toward 1:15. If it tastes harsh, try 1:17 and adjust from there.
What grind size should I use for pour-over?
Use a medium grind, roughly the texture of table salt or coarse sand. Too fine and the water drains slowly and the coffee turns bitter. Too coarse and it runs through fast and tastes thin and sour. A burr grinder gives you the even, consistent grind that pour-over rewards.
What water temperature is best for pour-over coffee?
Aim for 195 to 205 degrees Fahrenheit, which is 90 to 96 Celsius. If you do not own a thermometer or variable kettle, just bring the water to a boil and let it rest for about 30 seconds before you pour. That puts you right in the range.
How long should a pour-over take?
For a single cup, the whole brew usually takes about 2.5 to 4 minutes, including the 30-second bloom. Larger batches sit at the longer end. If yours finishes much faster, grind a little finer. If it drags well past four minutes, grind a little coarser.
Do I need a gooseneck kettle for pour-over?
It helps a lot but it is not required to start. A gooseneck spout gives you a slow, controlled stream so water lands where you want it. You can begin with any kettle and pour gently, then upgrade once you decide pour-over is your everyday method.